Adding an invoice: Payment link and PDF
Last updated: September 30, 2026
In Moder, you can create and send the customer either a payment link or a regular PDF invoice. Both are created on the reservation's Invoicing tab.
When the customer pays for the reservation via a Paytrail or Stripe payment link, the payment is automatically recorded in Moder. A PDF invoice, on the other hand, is paid directly into your company's account, after which the payment is manually recorded in Moderi.
In this guide, we will go through creating, editing, and sending an invoice.
👉 Tracking billing and payments in the invoice list: link to instructions
👉 Recording payments and receipt: link to instructions
👉 Credit invoice: link to instructions
A brief guide to creating an invoice
Watch the video to see how to create and send an invoice in Moder.
Payment link or PDF invoice?
If you use Paytrail or Stripe and the payment service is connected to your Moderi account, you can conveniently send the traveler a payment link from the Invoicing tab. A more traditional PDF invoice can also be created and sent from the same place:
The advantage of a payment link vs. a traditional PDF invoice
When the traveler pays for the booking using a payment link, the booking and the invoice is automatically marked as paid in Moder as well. This means you do not need to do any manual work to record the payment.
If you send the customer a traditional PDF invoice, the customer pays into your account and you must manually mark the invoice as paid in Moder.
How to create an invoice
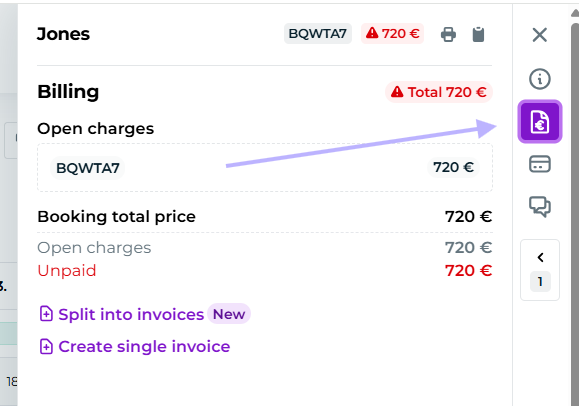
Open the desired booking by clicking it in either the calendar or the bookings list. Open the Invoicing tab and you will find a couple of options there:
+ Split into invoices
+ Create one invoice
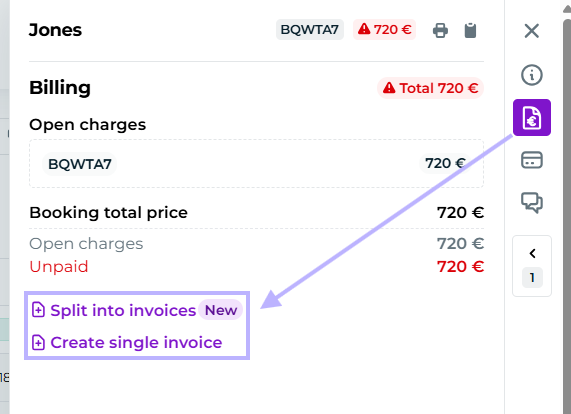
In this example, we will create one invoice for all bookings and extra services related to this collection, so we click "Create single invoice."
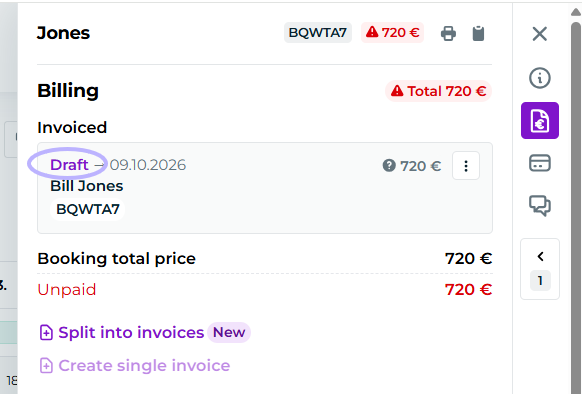
This creates an invoice draft:
If you do not need to make any changes to the invoice, you can next click the save as invoice button in the three-dot menu:
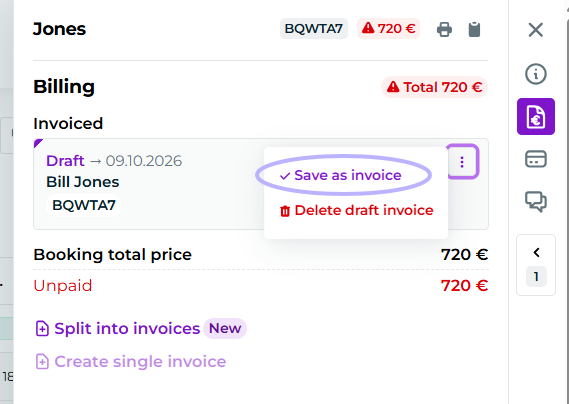
Please note that you can no longer edit the invoice rows after it has been saved and an invoice number has been generated for it!
Changes to the invoice rows must be made while the invoice is still a draft: see the instructions for editing the rows in the next section.
Three-dot menu is a convenient and quick way to add an invoice, save it, and mark it as paid from the same view—for example, when you need to quickly mark bookings received through external booking channels such as Booking.com as paid.
You can also send the invoice directly to the customer from the same menu after saving the invoice:
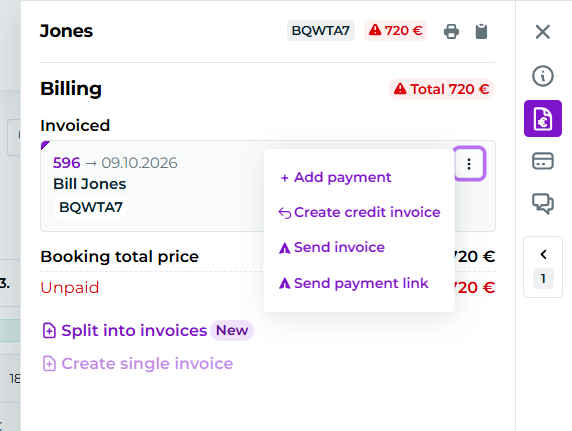
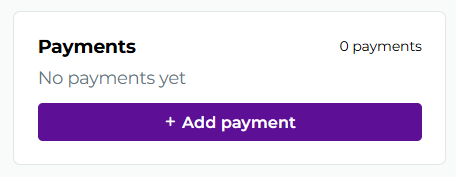
+Add payment button allows you to add a payment record to the invoice.
Create credit invoice button creates a credit invoice
Send invoice button sends a traditional PDF invoice.
Send payment link button sends a payment link.
The email is sent from no-reply@noreply.moder.fi
Editing an invoice draft
Watch the video for an overview of the invoice draft editing view:
How to edit an invoice draft
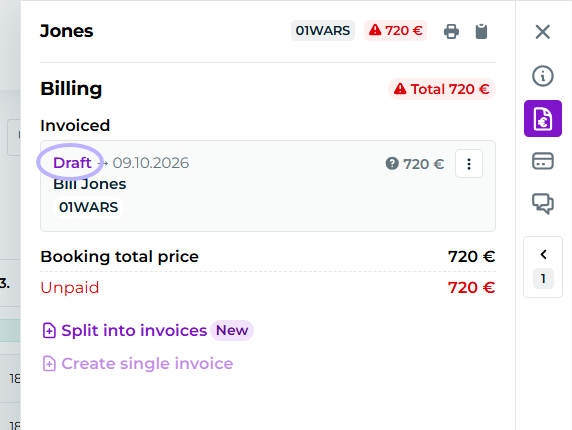
If changes are made to the invoice before it is sent, you can open the invoice editing view by clicking the Draft button:
Payer
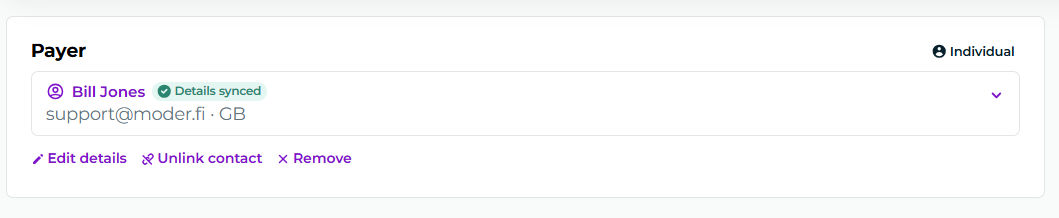
In the Payer section, you can manage the payer's information. The information comes directly from the reservation, but you can edit it, remove the contact association, or delete the contact:
If you first remove the contact synchronized from the reservation, you can select other information from your customer database. Personal contacts are individuals, while under companies you can search for business contacts:
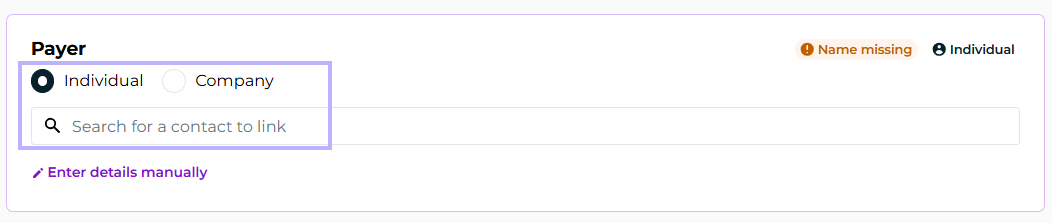
Personal contacts are managed in Moderi under Customers > Guests.
Company contacts, meanwhile, are managed under Customers > Companies.
You can also enter the information manually:
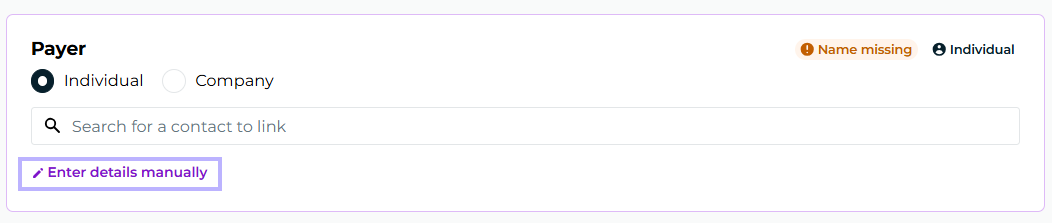
After entering the information manually, remember to click the Apply button at the bottom so that the information is saved to the invoice:

Information and dates
Under Information and dates, you can edit:
the invoice date (future dates only)
payment terms
delivery date
the customer's reference (in the Your reference field)
your own reference (in the Our reference field)
the invoice language
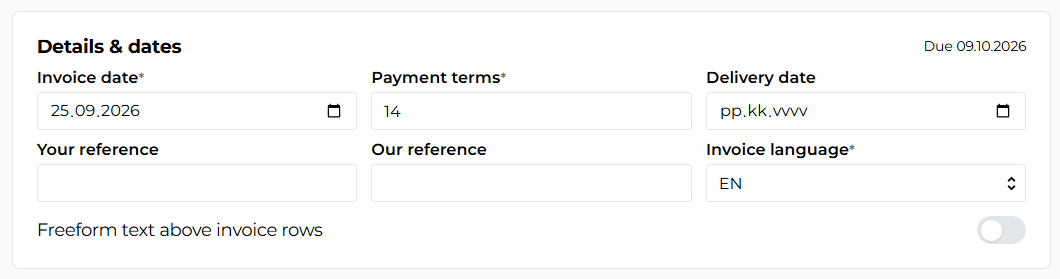
The date means the day on which the invoice was created. If you want to select another day on which the invoice was delivered, enter it as the delivery date.
Note! Even if I set the invoice delivery date to a future date, the invoice will not be sent automatically.
If you want to add free text to the invoice, do so using the Free text above invoice lines toggle:
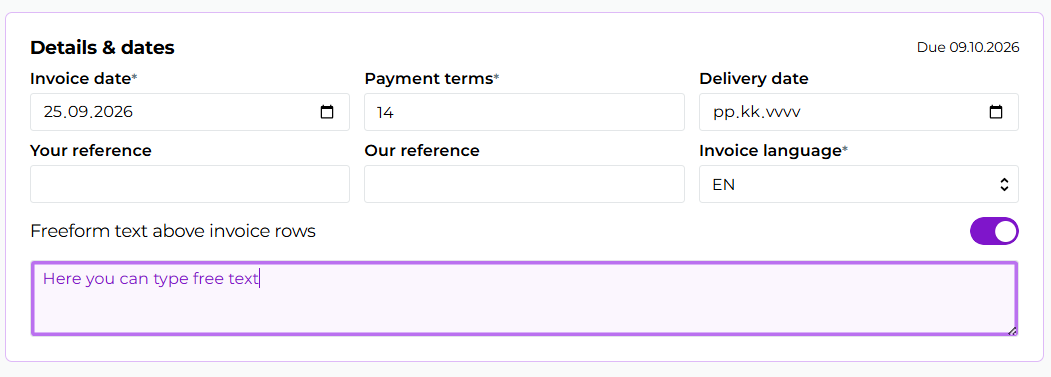
Please note that the toggle must remain on if you want the free text to appear on the invoice.
Invoice lines
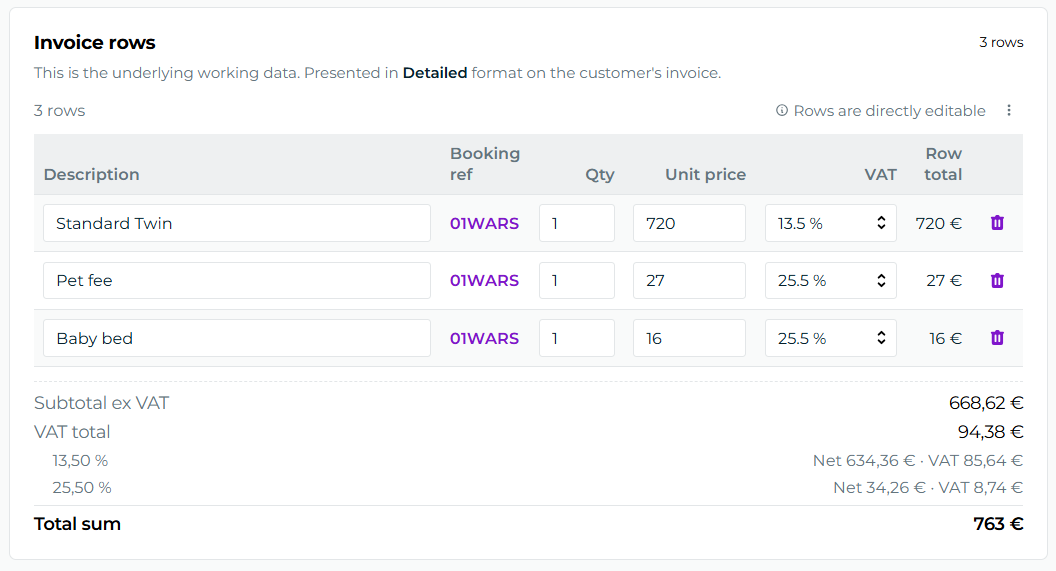
Under Invoice lines, you can edit the product lines included on the invoice. The lines come directly from the reservation, so if the reservation is correct, you may not need to edit the lines here.
Splitting invoices by amount
If, for example, you want to invoice 30% of the accommodation first and the rest later, you can easily reduce the unit price under Unit price:
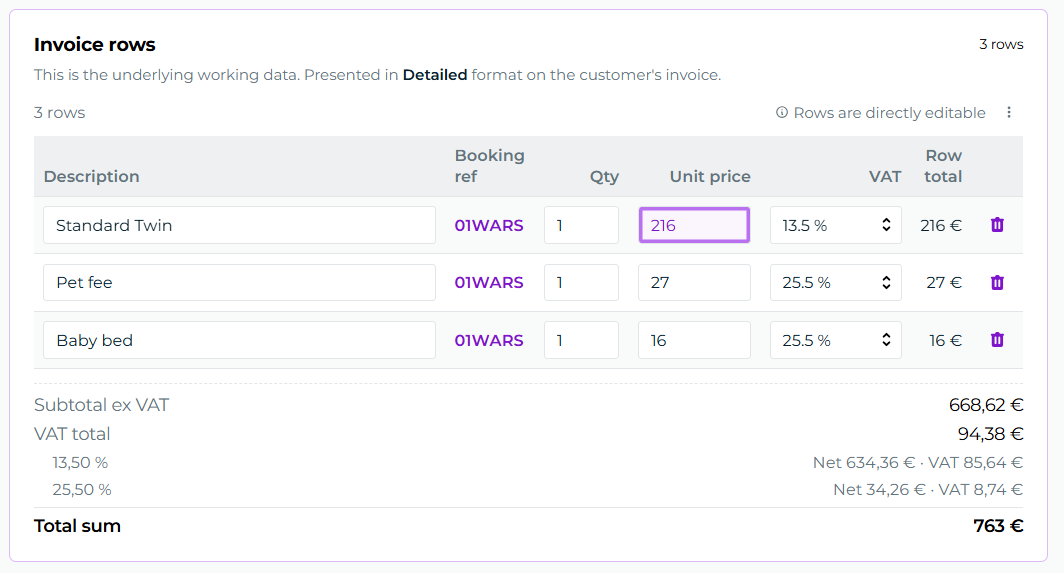
When splitting an invoice in this way, it may also be worth considering whether to include any additional services on the first invoice at all—additional services often change during the trip.
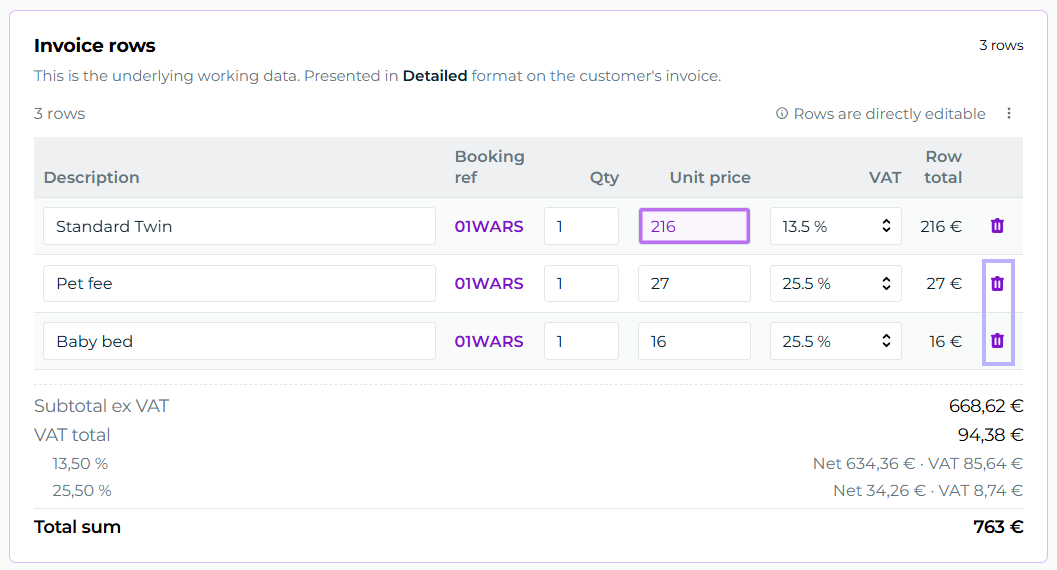
If you want to remove additional services from this invoice, you can use the trash bin icon:
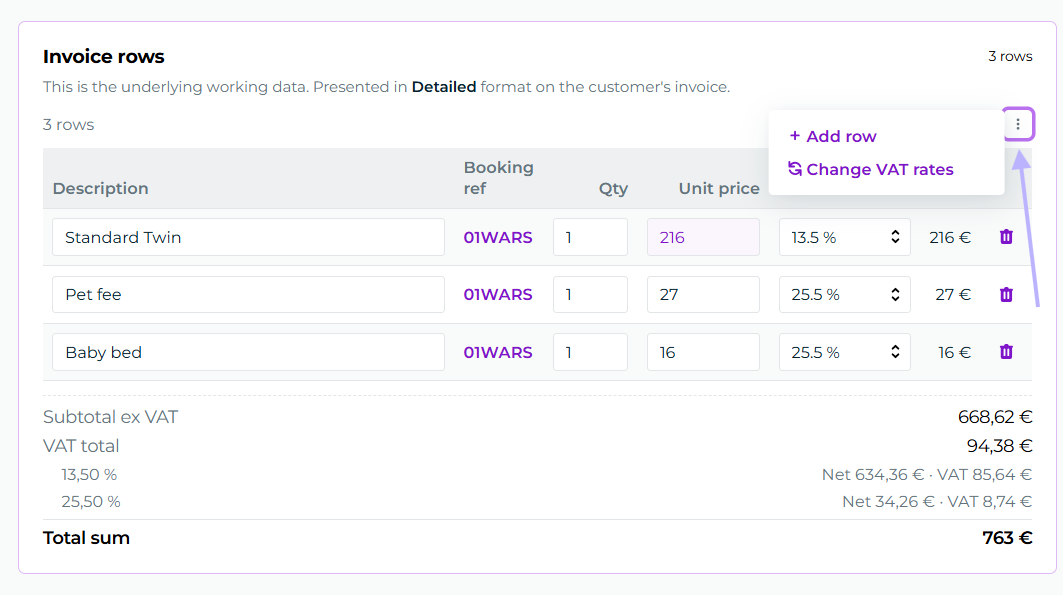
From the invoice lines' own three-dot menu, you can also add a line or change the VAT rates:
You can then create a separate new invoice for the remaining part from the Invoicing tab.
Important notes about editing invoice rows
Please note that Paytrail and Stripe do not support negative invoice rows, so payment links cannot contain negative rows.
Check the VAT% carefully, and if you notice that there are often errors, check which VAT% is set for the product.
If you add a custom row to the invoice using the +Add row button, it is not linked to the booking and may cause errors.
Invoice presentation
In the Customer's invoice section, you can define how the invoice is presented. This only affects the presentation and does not change the underlying data of the invoice rows.
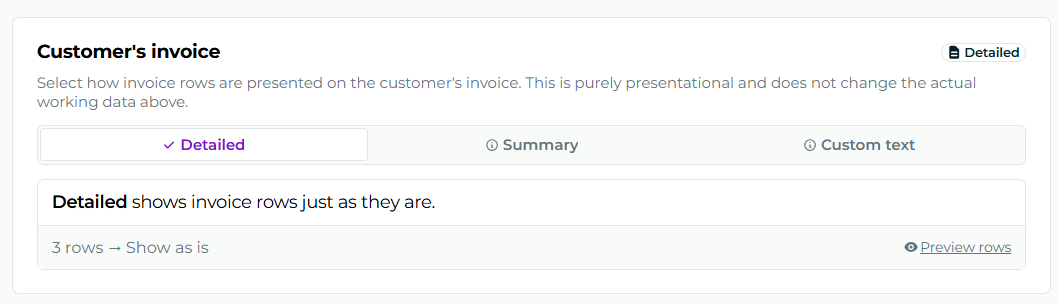
Moder invoices have three presentation options:
detailed
summary
custom text
Detailed or itemized is the default. In this case, the customer sees all invoice rows as they are.
Summary groups similar invoice rows together—particularly useful for large group collections.
Custom text replaces all invoice rows with one custom row where you can write whatever you want. The row price is the invoice total.
Delivery
There are more menus on the left side. Delivery lets you choose whether the invoice is sent to the customer as a regular PDF invoice or as a payment link.
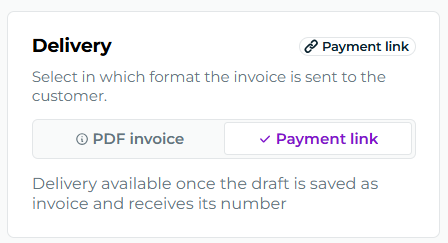
The invoice can only be delivered to the customer once the draft has been saved as an invoice and thus locked, and has an invoice number.
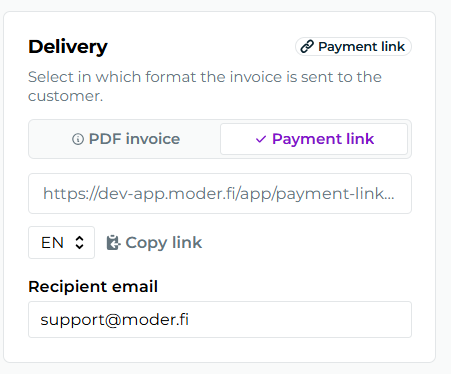
Once the invoice has been saved, you can also copy the payment link address or change the payment link language from this same Delivery section:
Payments
Once the invoice draft has been saved as an actual invoice, you can also add a payment entry to it from the Payments section:
Events
You can conveniently track the invoice activity from the Events section. It shows when the draft was created, when it was saved as an invoice, when it was sent, and later also when it was paid, and so on.
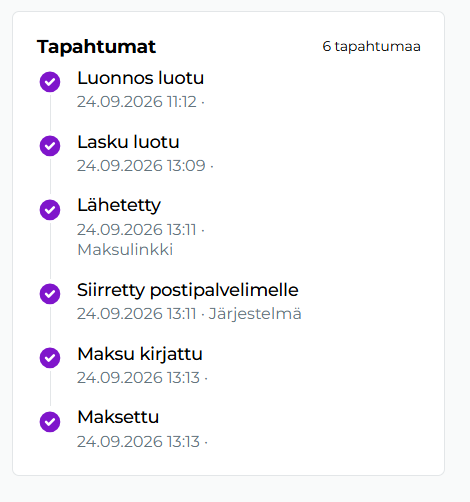
You can also see which user credentials were used to edit the invoice.
Saving or deleting an invoice draft
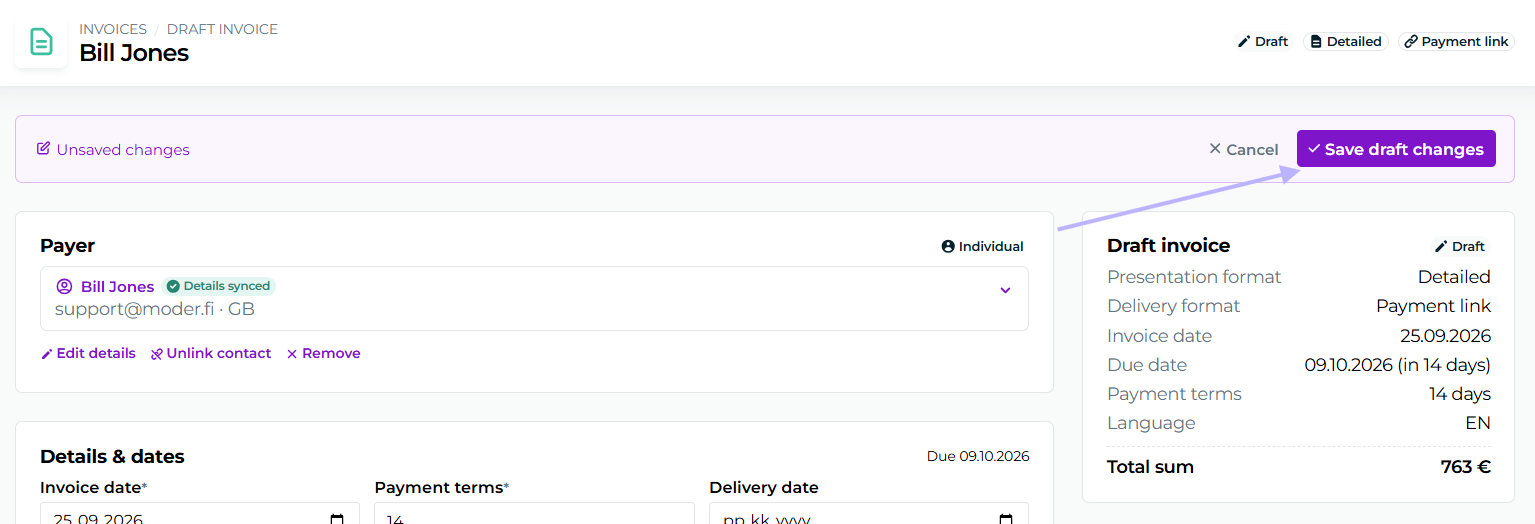
First you will be prompted to Save draft changes.
When the invoice draft is ready, you can save it using the Save as invoice button at the top.
Please note that completing the process of saving the draft as an invoice so that an invoice number is generated, also locks the invoice rows. You can no longer edit them after this step.
You are still welcome to edit payer details or the presentation selection.
You can also delete the draft using the Delete draft button.
An invoice that has already been saved cannot be deleted. A credit invoice must be created for it, with any corresponding payment reversals.
Sending the invoice
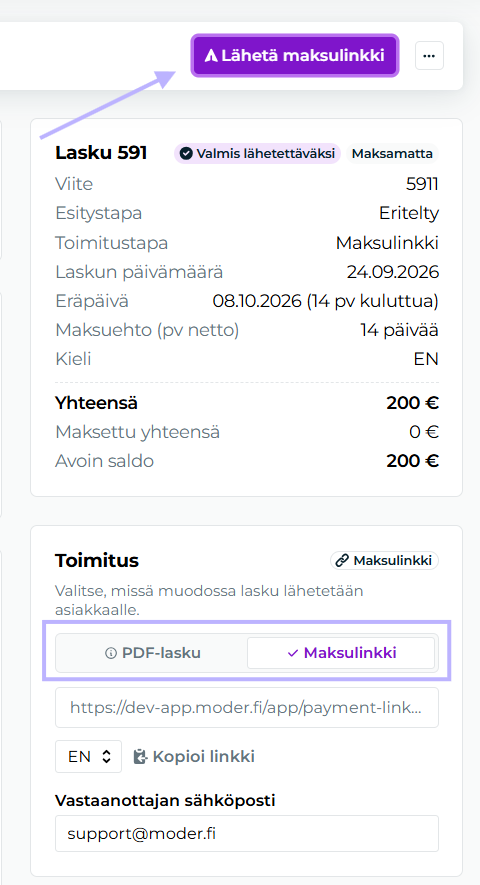
Once the invoice has been saved, you can send it from the upper-right corner of the invoice editing view using the Send payment link / Send invoice button.
The delivery method is selected below in the Delivery section:
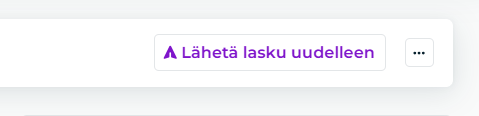
Even if the invoice has already been sent once, you can always send it again using the Resend invoice button:
Sending the receipt
Once the invoice has been paid, a Send receiptbutton appears at the top of the invoice editing view. Use it if the customer wants the receipt sent to their email.
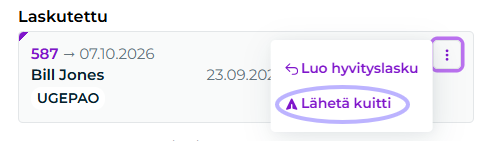
You can also send the receipt directly from the booking's Invoicing tab, using the three-dot menu and the Send receiptbutton.
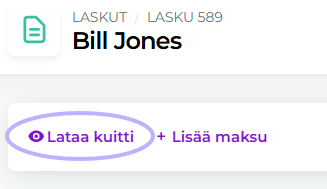
You can also download the receipt as a PDF using the Download receiptbutton when the invoice has a payment entry:
Payment link expiration
We are often asked when Paytrail payment links expire. At the moment, a Paytrail payment link essentially never expires, so even if the invoice due date has passed, the payment link still works.
Splitting products across different invoices
Do you have a group booking or a booking collection, and want to itemize products on different invoices? This can be done using this button:
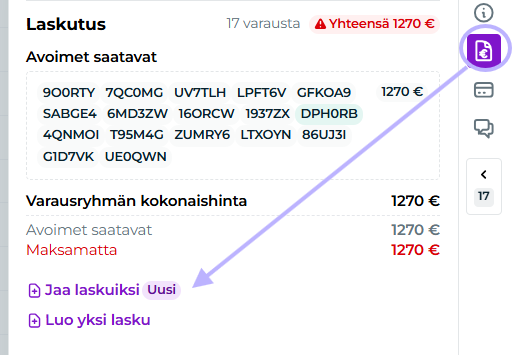
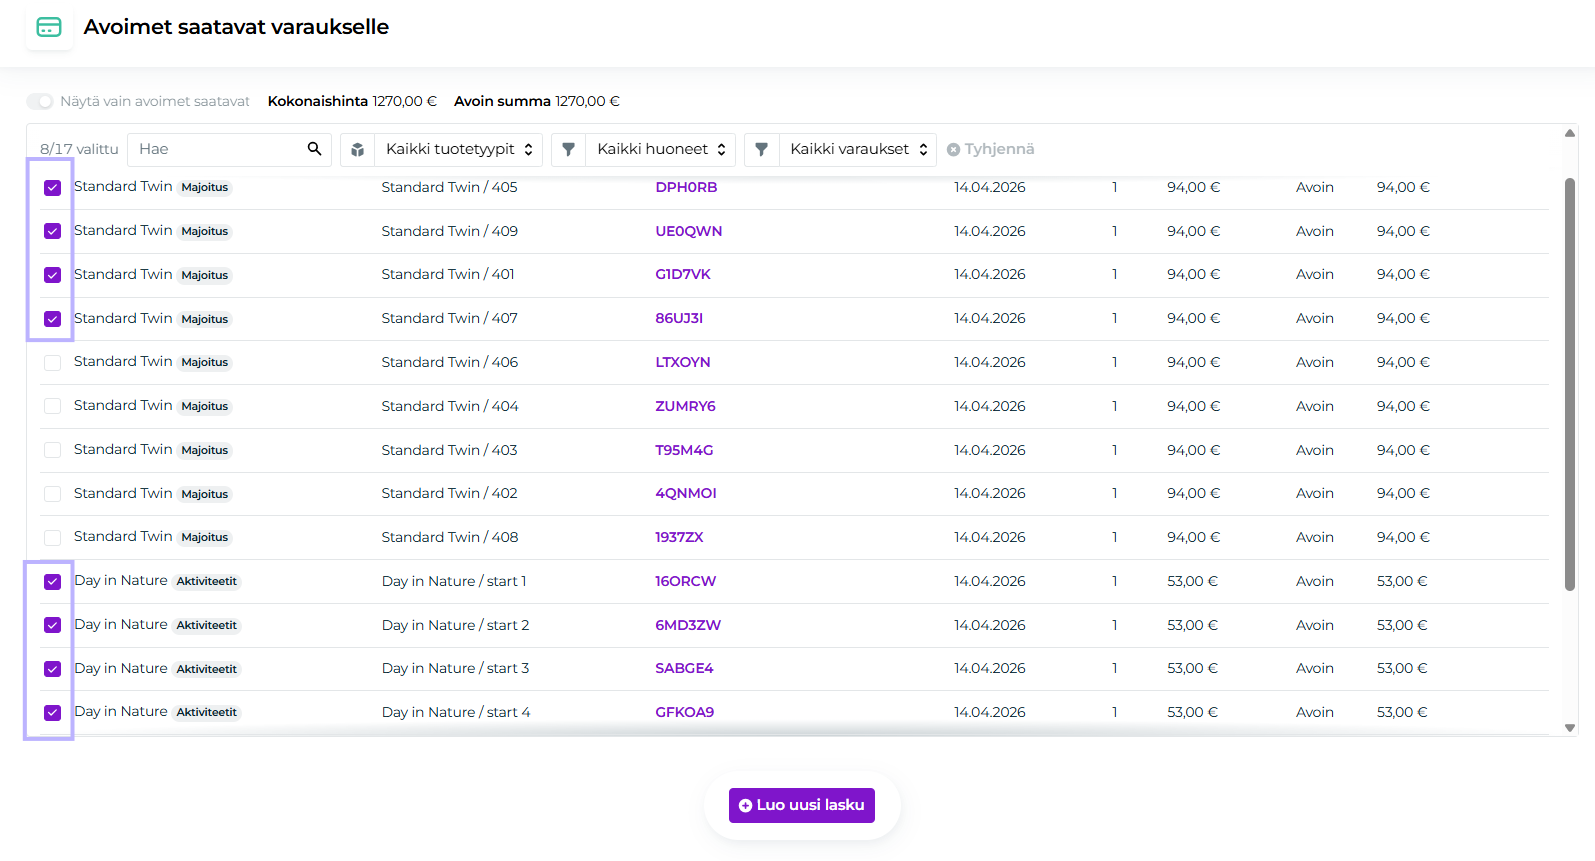
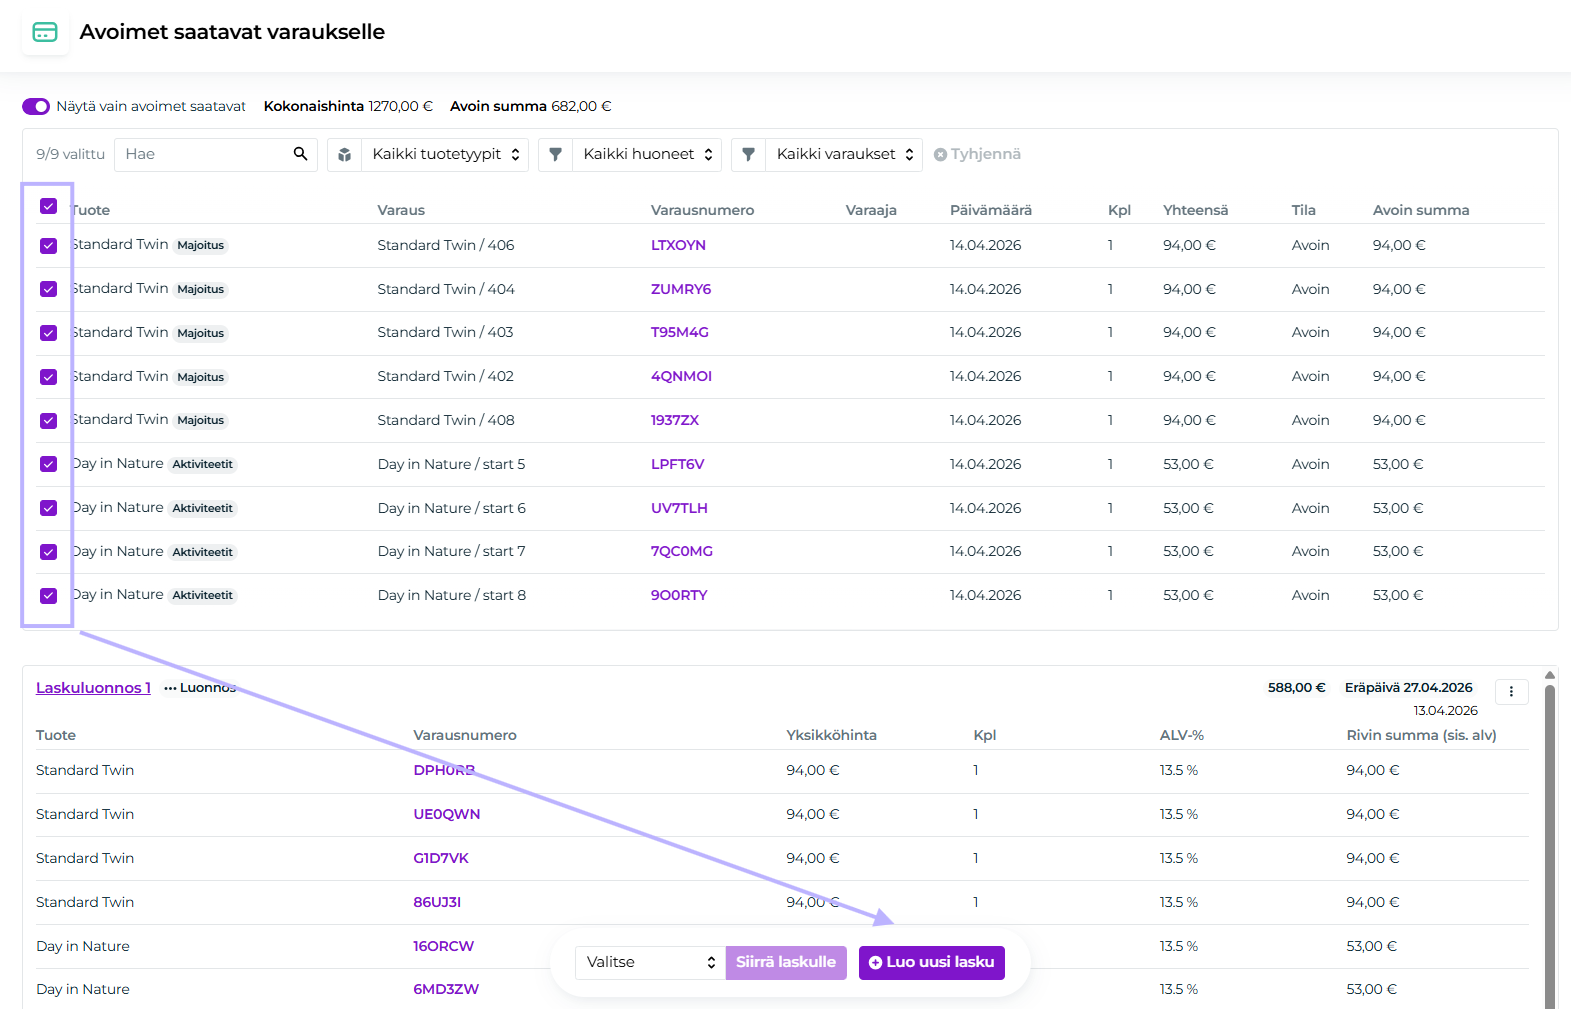
After this, on the open receivables -page, select the products that will be included on the first invoice. In this example, we are splitting 4 Standard Twin rooms and 4 Day in Nature activities from the booking onto one invoice, and the remaining products onto another invoice.
First, select the products for the first invoice:
Then click + Create new invoice
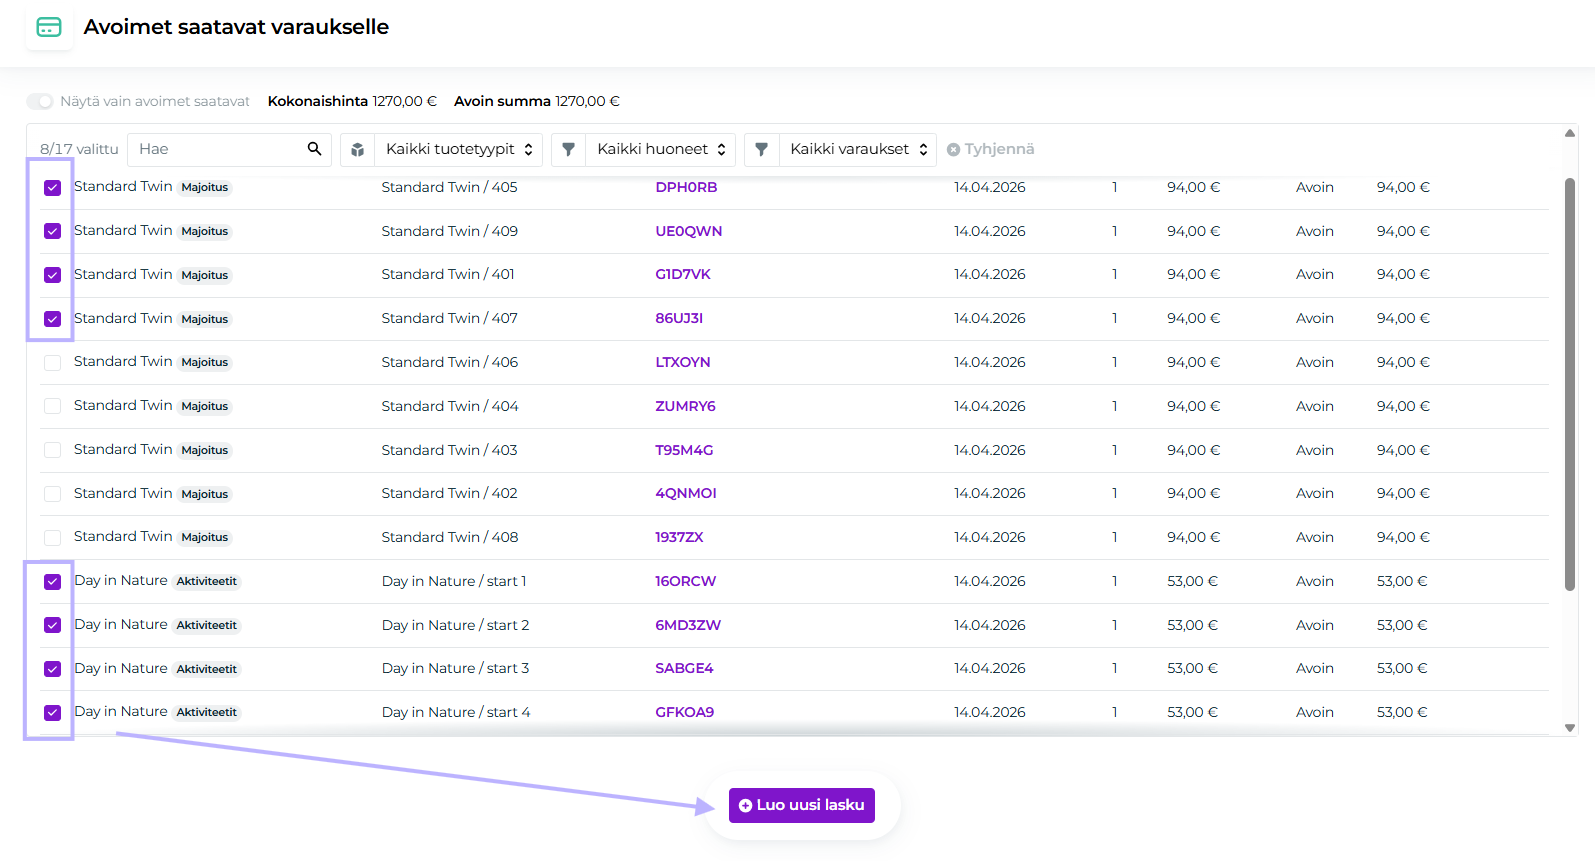
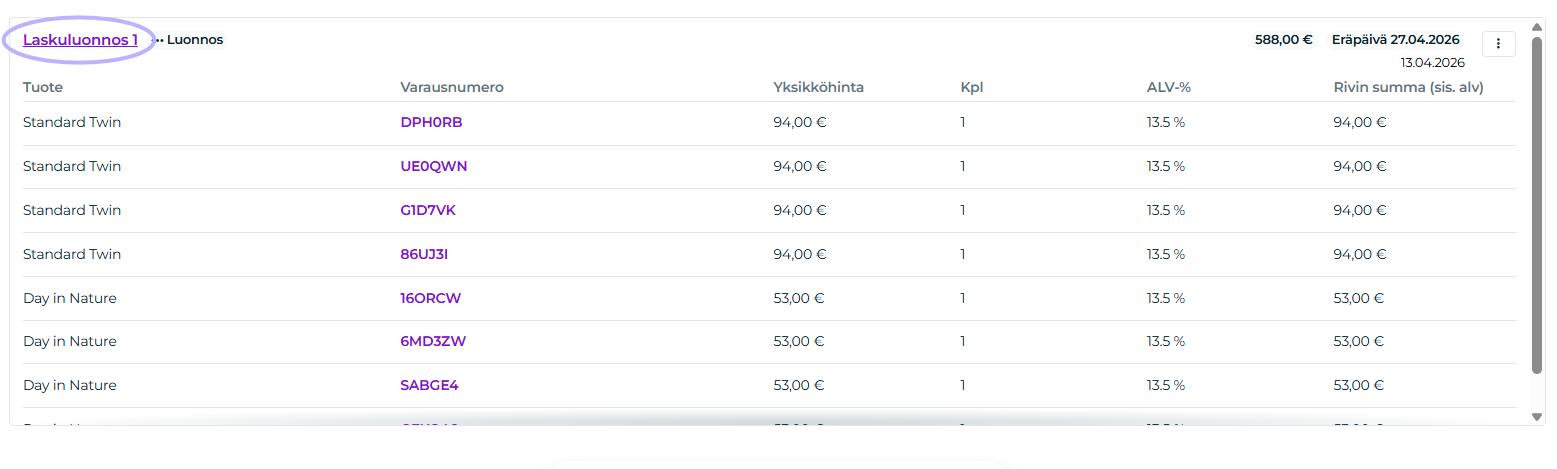
The products are moved to the first invoice draft:
Select the remaining products for the new invoice draft:
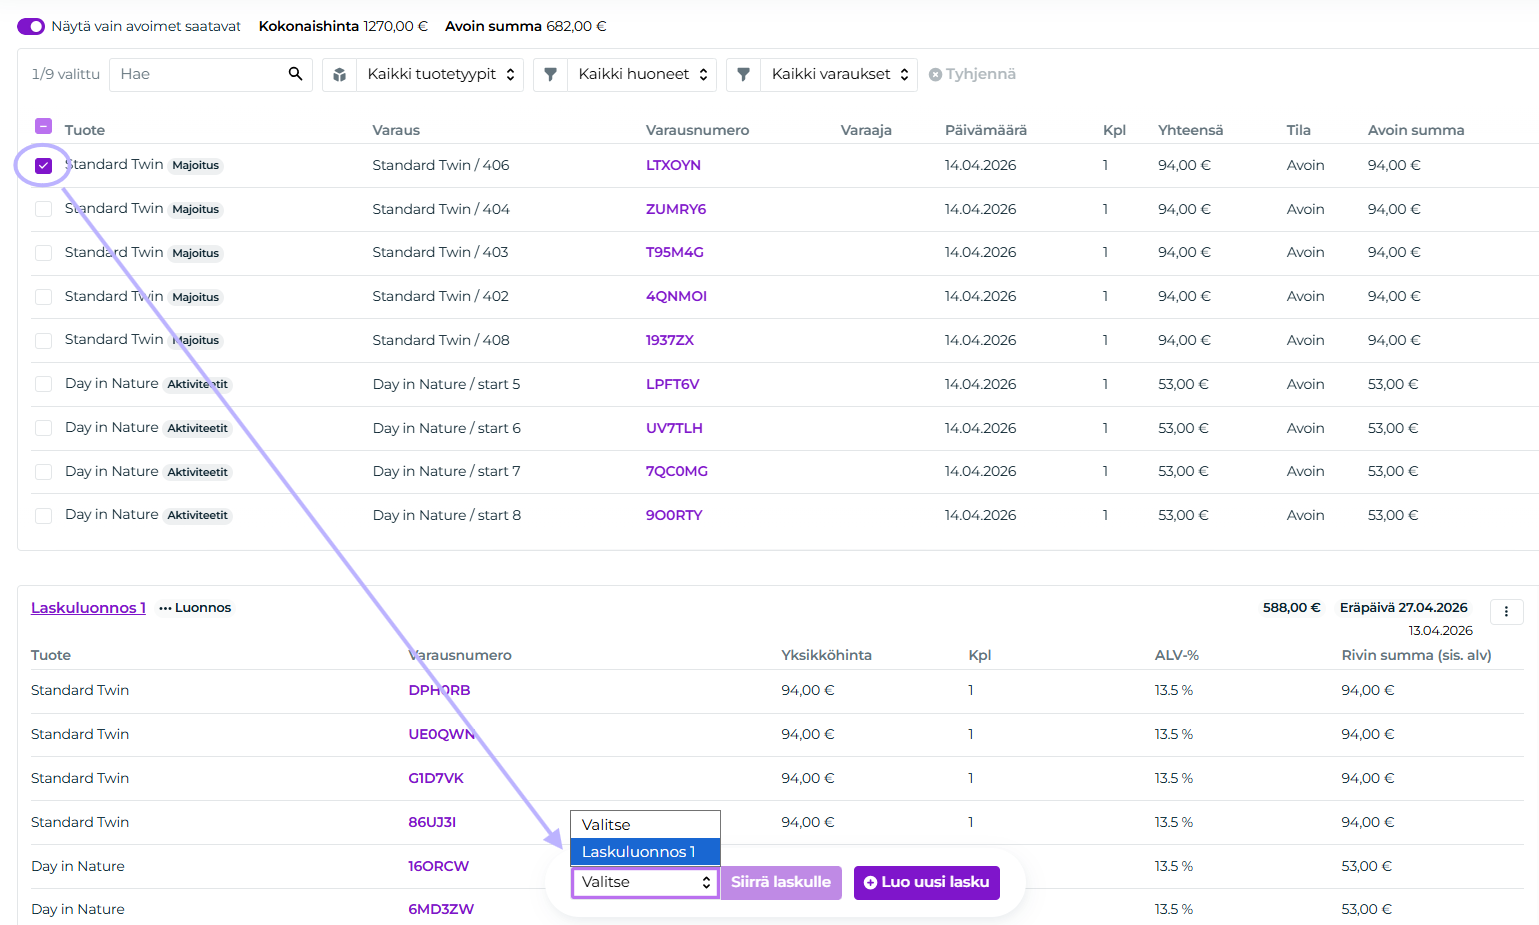
Alternatively, move them to an existing invoice draft if, for example, something was left out of the first invoice:
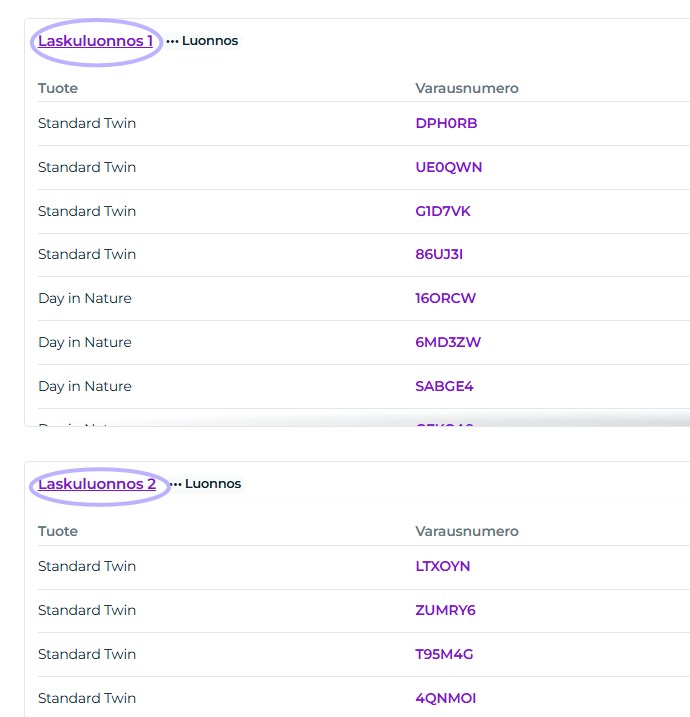
Now we have two invoice drafts. You can access the invoice view by clicking the Invoice draft heading:
Save and/or send the invoices by email as usual.