Stripe payment terminal order, installation and use
Last updated: June 17, 2026
Ordering Stripe payment terminal
To order a payment terminal you need a Stripe account that is linked as a sub‑account of Moder.
If you already have Stripe set up in Moder's online store, you can place a payment terminal order directly from that Stripe account.
If you do not yet have a Moder-compatible Stripe account, please first contact Moder support (support@moder.fi), from which we will send you the Stripe account order link.
Once you have created a Stripe account via the link sent by Moder customer support, add the Stripe Account ID to Moder at the Settings ---> Integrations ---> Payments.

Once the Stripe account is ready for use, you can order the required number of payment terminals directly from your Stripe account. The Stripe payment terminal compatible with Moder is BBPOS WisePOS E, so please make sure you order exactly this model.
The Stripe terminal operates via a WIFI connection, but please note that if you want to connect the Stripe payment terminal via an Ethernet connection, you will need to order a dock separately, i.e., the WisePOS E Dock, along with the payment terminal.
The Stripe payment terminal must be connected to the same network to which the computers used by Moder are connected, so if the computers used by Moder are connected via an Ethernet connection, the Stripe payment terminal must also be connected to the same Ethernet network.
Please note that a Stripe terminal can be registered to one property in Moder.
Ordering a Stripe payment terminal in a nutshell
Request a Stripe account order link from support@moder.fi, if you don't yet have a Moder-compatible Stripe account
Add your Stripe account's Account ID to Moder in Settings ----> Integrations ---> Payments.
Place a payment terminal order from your Stripe account, and make sure you order exactly this model: BBPOS WisePOS E
remember to also order the WisePOS E Dock, if you will connect the payment terminal via Ethernet
one payment terminal can be registered to a single Moder property
Stripe payment terminal installation and activation
Once the terminal has arrived, you can connect it to Moder as follows:
Make sure you have the address, postal code and city set in the property settings in Moder. These details must be present for the connection to succeed. You can find your property settings by going in Moder to Webshop ---> Properties. Click the property name to open its specific information.
Also ensure that the property settings contain a Moder network address. This is automatically set if your property, i.e., your online store, is published for customers.
Connect the payment terminal to the same Internet network, to which the computers running Moder are connected. This is very important to get the payment terminal connected to Moder!
You can find more information about Stripe's network requirements here: https://docs.stripe.com/terminal/network-requirements
Open the Settings menu on the Stripe payment terminal by swiping right across the reader's screen
Select "Generate pairing code" from the Settings section of the payment terminal or "Create registration code"
Create a registration code. In Moder, go to Settings ---> Integrations ---> Payments.
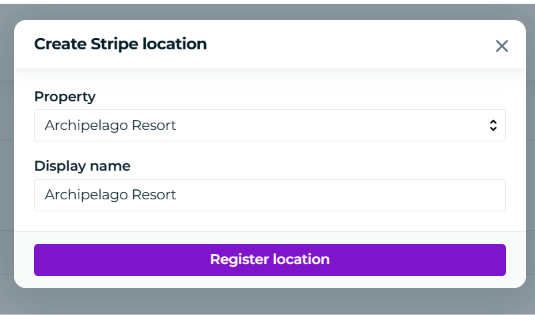
click "Create Stripe location" on the bottom right corner.
select a property and give a display name (they can be the same)
click "Register location"
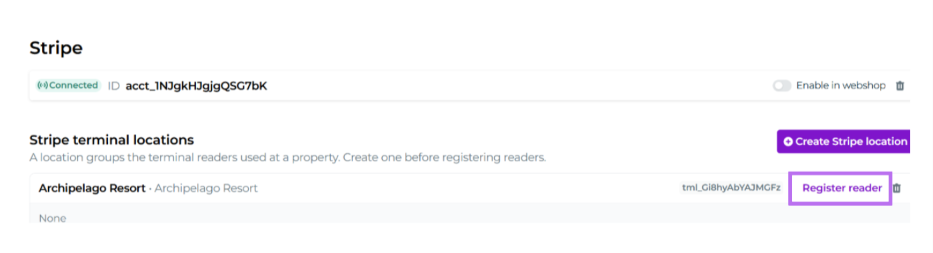
click next "Register reader"
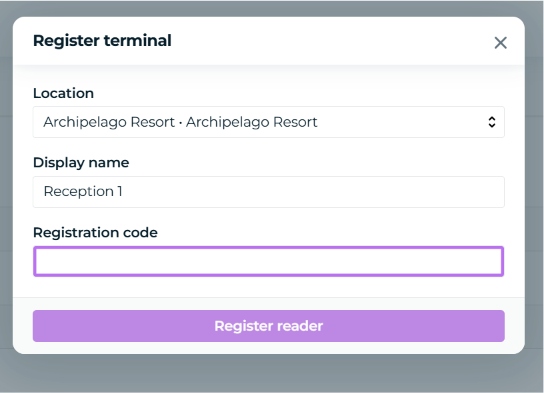
give the payment terminal a display name, and add the pairing code that you have just generated on Stripe reader to "registration code" box
finally, click "Register reader"
You can also add your property's address information to the Stripe merchant panel, and register the payment terminal used in each property to its own location by going in the merchant panel to "Terminals".
first create locations for the payment terminals under Terminals ---> Locations
then click the location you created for the payment terminal and click "Register reader", and register the payment terminal to the desired location using the terminal's serial number or registration code
note! this step is not mandatory, but recommended, especially if you have multiple payment terminals in use across different branches
The payment terminal is now connected to Moder. Next, it is important to test the connection by creating a test reservation in Moder and an invoice for it. We will next explain how to send a payment to the terminal.
Charging payments with a Stripe payment terminal
Create invoice
Create the invoice normally from the reservation Invoicing-tab.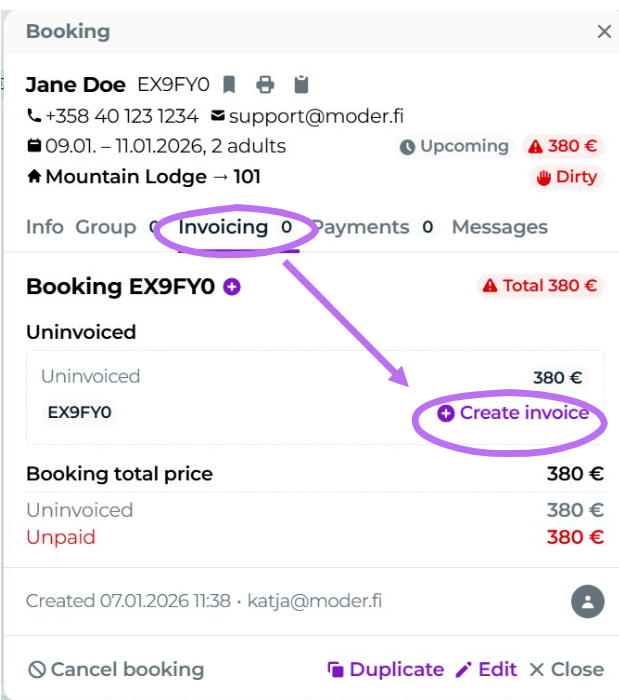
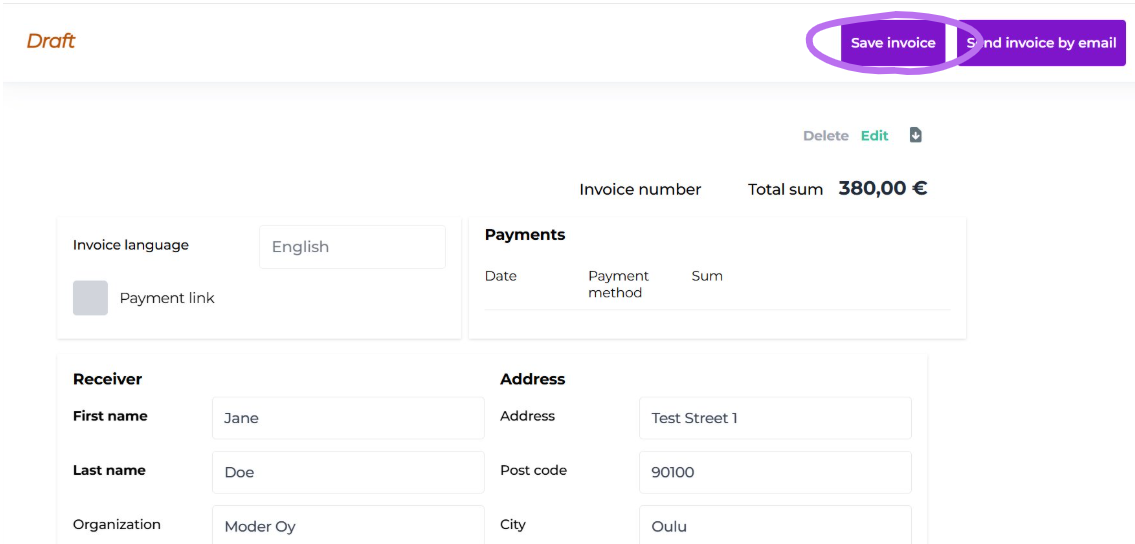
Make the necessary edits and save as invoice
Moder first creates a draft of the invoice, which you can edit if needed (e.g., modify the recipient's information or delete invoice items). Make the necessary edits and save the draft as an invoice.
So first click "Save" and then "Save as invoice".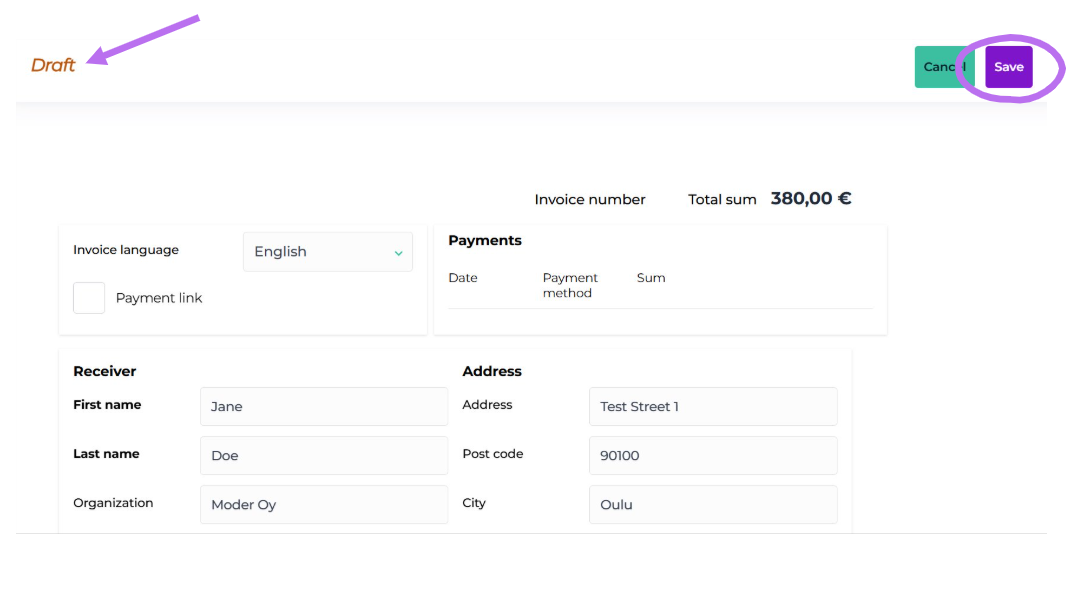
Click "Credit Card Payment".
Click the "Credit card payment"-button. The button appears when the draft invoice has been saved as a final invoice.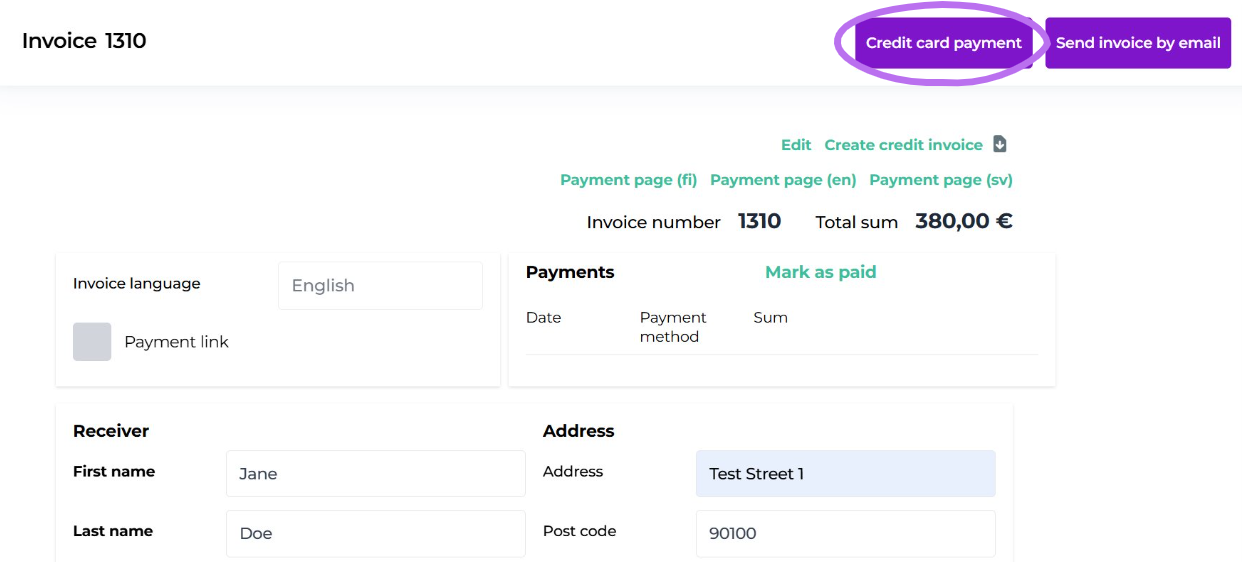
Select the correct terminal from the drop down menu and click "Pay with Stripe".
This will send the payment request to the terminal you selected.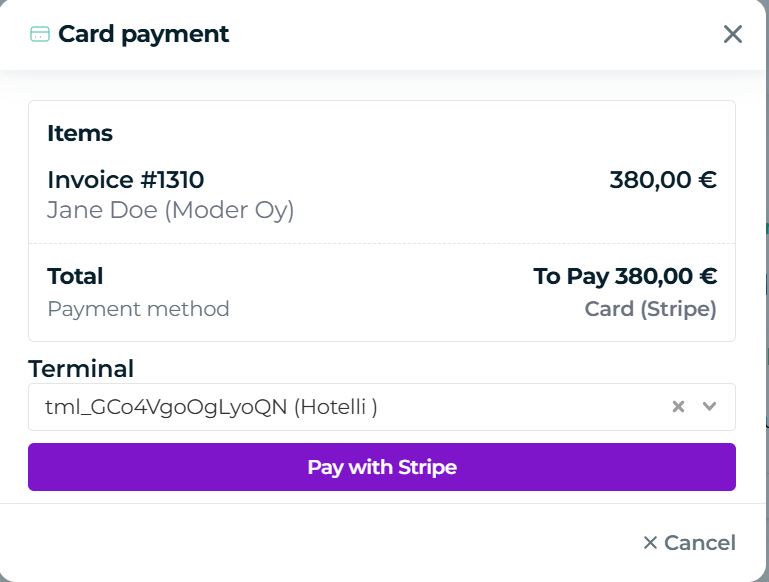
Payment via terminal
When the customer successfully pays with the terminal, the information is automatically transferred to Moder and the invoice is marked as paid with the payment status Card.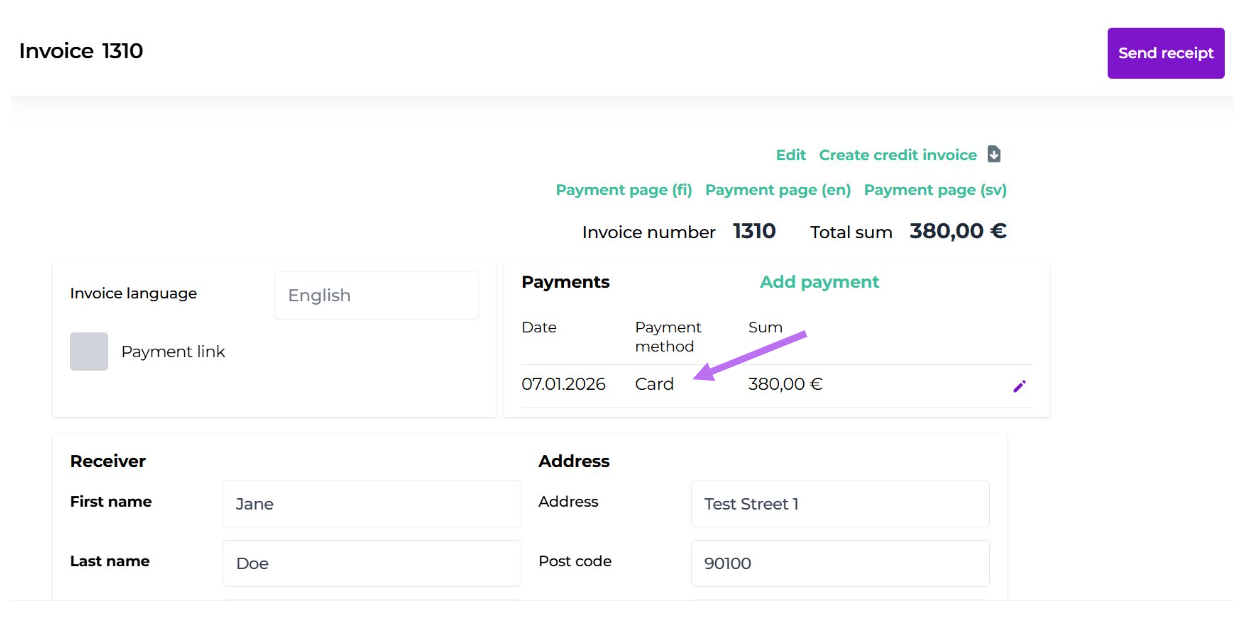
Send the receipt to the customer
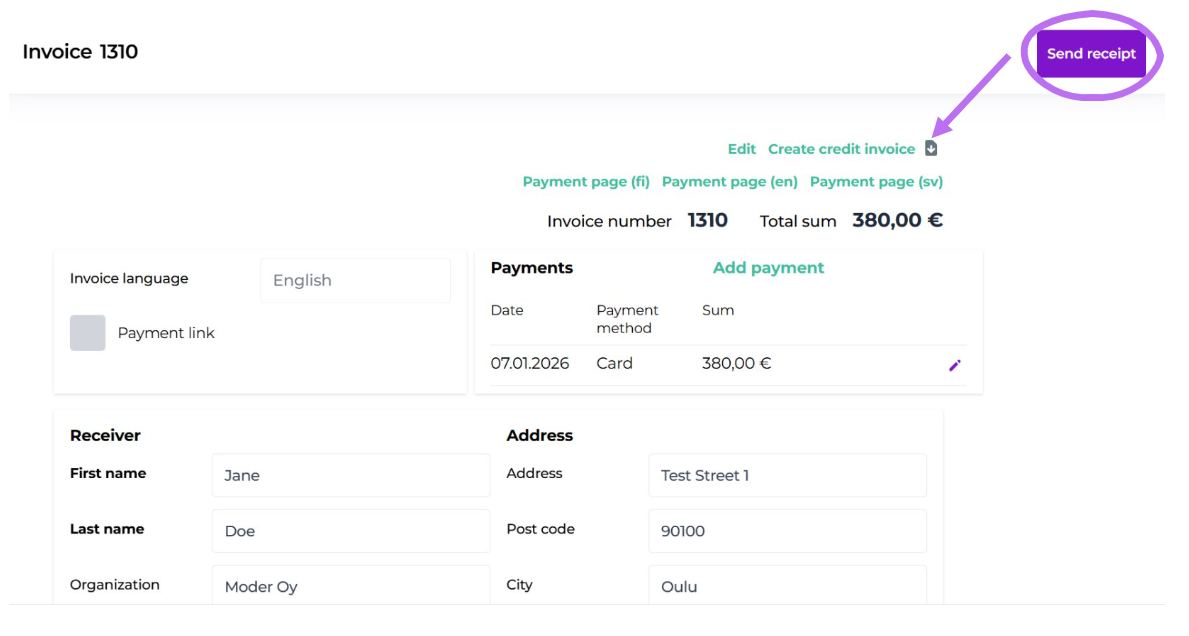
You can send the receipt by email or open the printable receipt from the downward pointing arrow icon.
Refund
Refunds must be made to the customer's card via the Stripe merchant dashboard. So log in to Stripe's merchant dashboard, find the payment to be refunded, and process the refund to the customer's card.
For the corresponding invoice in Moder, a credit note must be issued, which should be marked as paid using the same payment method as the original invoice, i.e., the payment method "Card".
Sending payment to a payment terminal from Moder POS
From Moder's cash register (Moder POS) you can send a payment request to the Stripe terminal by clicking the button "Stripe".
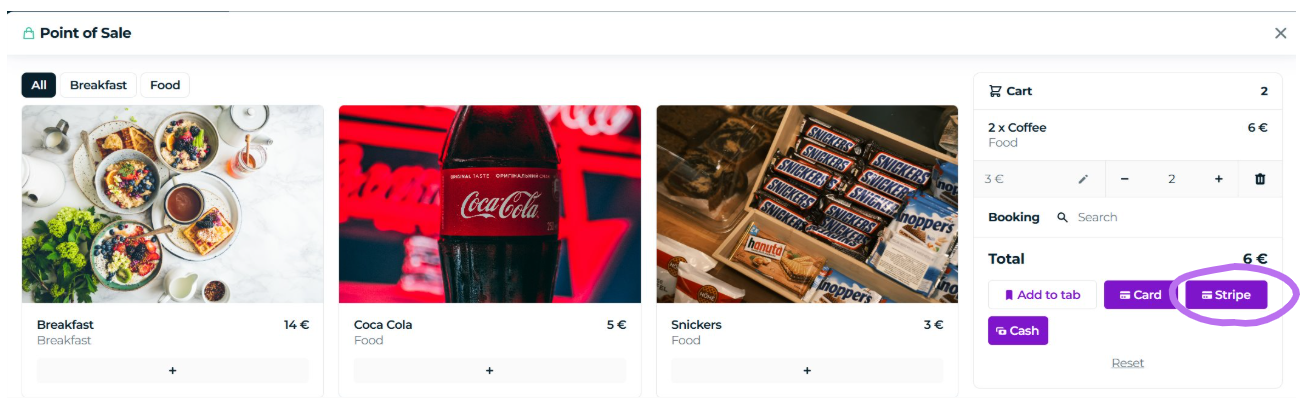
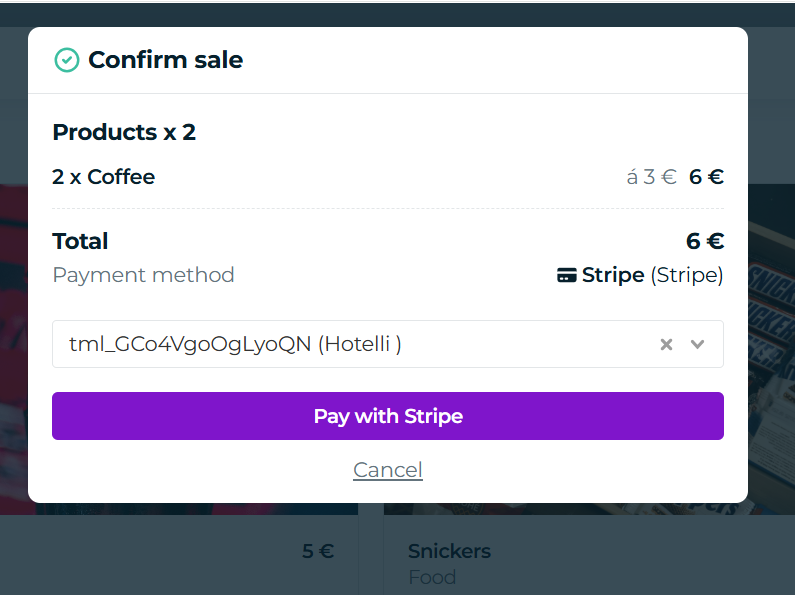
Then select the correct payment terminal from the drop down, to which the payment should be sent. Click "Pay with Stripe"
Possible refunds of charges made from the cash register should be processed through Stripe's merchant panel in the same way as refunding an invoice paid via Stripe terminal.